
Quick Navigation
- Why Hatch Your Own Brine Shrimp?
- What You Need to Hatch Brine Shrimp
- How to Hatch Brine Shrimp Step by Step
- Salinity, Temperature and pH for Maximum Hatch Rates
- Comparing Brine Shrimp Egg Options
- Enriching Brine Shrimp for Better Nutrition
- How Often to Hatch Brine Shrimp
- Feeding Baby Brine Shrimp to Fish
- Growing Brine Shrimp to Adult Size
- Common Problems When Hatching Brine Shrimp
- Building a Complete Live Food System
- FAQs
If you want to know how to hatch brine shrimp at home, you are in the right place. Hatching your own brine shrimp is one of the simplest and most rewarding things you can do as a fish keeper. It costs almost nothing, takes about 24 hours, and gives you a constant supply of live, nutritionally loaded food that triggers feeding responses in almost every fish that encounters it. Whether you are breeding clownfish, raising fry, keeping a mandarin dragonet, or just want your community tank to light up at feeding time, knowing how to hatch brine shrimp is a skill every serious fish keeper should have.
I have been working with live marine foods professionally in Wales for over 18 years, and brine shrimp remain one of the most useful live foods in the hobby. This guide covers everything you need to know to hatch brine shrimp successfully at home, from choosing the right eggs and setting up a simple hatchery, through the hatching process itself, to harvesting, enriching, and feeding the newly hatched nauplii to your fish. Follow this process and you will have live brine shrimp ready to harvest within 24 to 36 hours of starting. For a condensed version of this guide with all the key parameters in one place, visit our brine shrimp hatching landing page, where you can also download the complete printable PDF guide.
Why Hatch Your Own Brine Shrimp?
Before getting into the how, it is worth understanding the why. Brine shrimp (Artemia) are one of the most widely used live foods in the aquarium hobby for very good reasons. When you hatch brine shrimp eggs, the newly emerged nauplii contain a yolk sac packed with proteins, essential fatty acids, and carotenoids. This makes them one of the most nutritionally dense live foods available during the first 12 hours after hatching, before the yolk sac is consumed and nutritional value begins to decline.
Hatching your own brine shrimp at home gives you several advantages over buying adult brine shrimp or relying on frozen alternatives. You get live, moving prey that triggers hunting behaviour in fish that ignore frozen food. The cost per feeding is a fraction of buying live or frozen adult brine shrimp. You control the timing, hatching exactly when you need the food. And most importantly, baby brine shrimp are small enough to feed to fish fry, newly metamorphosed clownfish, and small-mouthed species that cannot handle adult brine shrimp or mysis.
For marine breeders, learning how to hatch brine shrimp is essential. Clownfish, cardinalfish, dottybacks, and most other breeding projects depend on a reliable supply of freshly hatched brine shrimp as the second food after live rotifers. Without this step, most fry simply will not make it through metamorphosis. The connection between rotifers, brine shrimp, and successful marine fish breeding is covered in more detail in our rotifers for fry food guide.
What You Need to Hatch Brine Shrimp
The beauty of learning how to hatch brine shrimp is that the equipment list is short and inexpensive. You do not need specialist lab gear or expensive setups. A basic hatchery can be built from household items, or you can buy a purpose-made hatchery that takes the guesswork out of the process.
Here is the complete list of what you need to hatch brine shrimp successfully at home.
Brine shrimp eggs (cysts). The quality of your eggs directly determines your hatch rate. Cheap, low-grade eggs can produce hatch rates as low as 40 to 50 percent, which wastes time and money. Our Brine Shrimp Eggs with 90% hatch rate are premium grade and deliver consistent results every time. For those who want an even cleaner setup without egg shells to filter out, our Decapsulated Brine Shrimp Eggs have had the outer shell removed, eliminating the harvesting headache and improving digestibility.
Brine Shrimp Eggs 90% Hatch Rate

£14.49
Brine Shrimp Eggs 90% Hatch Rate: Premium Nutrition for Your Aquarium Your fish are spawning, or you are attempting to raise fry for the first time, and the question of what to feed them in those first critical days is… read more
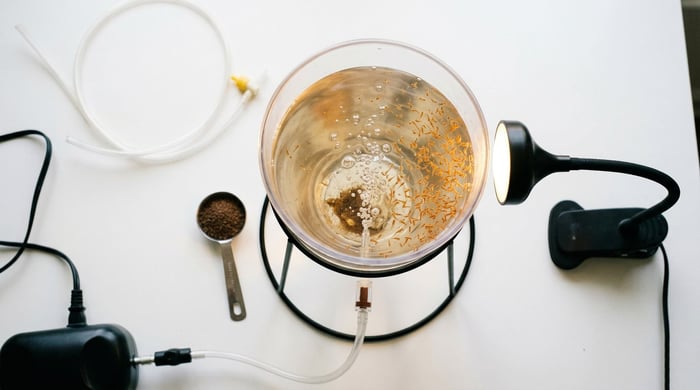
A hatching vessel. The classic homemade option is an inverted 2-litre plastic bottle with the bottom cut off. A purpose-built option like our Brine Shrimp Hatchery or the JBL Artemio Set takes the DIY out of the equation and produces more consistent results. For serious breeders running multiple hatches per week, a dedicated commercial hatchery is well worth the investment.
An air pump and airline tubing. Brine shrimp eggs need constant aeration to stay suspended in the water column. Eggs that settle on the bottom will not hatch. A simple aquarium air pump with airline tubing is all you need.
Marine salt. Brine shrimp only hatch in saltwater. Any non-iodised salt works, but marine salt produces the best results. You do not need expensive reef salt for this, basic marine salt or even rock salt will do.
A light source. A small LED lamp or desk light positioned near the hatchery improves hatch rates and helps you harvest the nauplii later. Brine shrimp nauplii are phototactic, meaning they swim toward light. You can use this behaviour to concentrate them for easy harvesting.
A fine mesh sieve or brine shrimp net. You need a sieve with a mesh size of around 100 microns to separate the baby brine shrimp from the hatching water before feeding them to your fish.
A heat source (optional but recommended). Brine shrimp hatch fastest at 26 to 28 degrees Celsius. A warm room is usually enough, but in cooler conditions you may want to place the hatchery near a small heat source or use a basic aquarium heater.
How to Hatch Brine Shrimp Step by Step
Now for the core process. Follow these steps and you will have baby brine shrimp ready to harvest within 24 to 36 hours.
Step 1 - Prepare the Saltwater Solution
Fill your hatching vessel with approximately 1.5 to 2 litres of dechlorinated tap water or RO water. Add 25 grams of marine salt (roughly 1 tablespoon per litre) and allow it to dissolve completely. The target salinity is around 25 parts per thousand, which equates to a specific gravity of approximately 1.018. You do not need to be exact, brine shrimp are tolerant of a wide salinity range, but this is the sweet spot for maximum hatch rates.
Step 2 - Set Up Aeration
Connect your air pump to the airline tubing and run the tubing down into the bottom of the hatching vessel. The goal is gentle but constant agitation that keeps the brine shrimp eggs suspended in the water column and prevents them from settling. You want a steady stream of bubbles from the bottom, not violent churning that damages the eggs. If you can see eggs rolling around in the water rather than sitting on the bottom, your aeration is correct.
Step 3 - Add the Brine Shrimp Eggs
Add half a teaspoon to one teaspoon of brine shrimp eggs to the vessel. Do not overload. More eggs does not mean more nauplii. Overcrowding reduces oxygen availability and actually lowers your hatch rate. For most home aquarists, half a teaspoon produces plenty of food for a day's feeding. Larger hatches can be done in multiple vessels or in larger hatcheries.
Step 4 - Light and Temperature
Position a light source near the hatchery. A small LED lamp or desk light within 20cm of the vessel is ideal. Light is not strictly essential for hatching but it significantly improves hatch rates and speed. Maintain a temperature between 26 and 28 degrees Celsius if possible. At this temperature, the eggs will hatch in about 24 hours. At cooler temperatures of 20 to 24 degrees, hatching can take 36 to 48 hours. Above 30 degrees, the nauplii die quickly.
Step 5 - Wait for the Hatch
After 24 hours, you should see the first signs of successful hatching. The water will take on a slight orange or pink tinge from the newly emerged nauplii. Shine a torch into the vessel at an angle and you will see tiny specks moving toward the light. These are your baby brine shrimp. If you do not see activity after 24 hours, give it another 12 hours before troubleshooting. Cooler conditions simply take longer.
Step 6 - Harvest the Baby Brine Shrimp
Turn off the air pump and wait five to ten minutes. During this time, three distinct layers will form. Unhatched eggs will settle on the bottom. Empty egg shells will float on the surface. The live nauplii will concentrate in the middle, attracted toward any light source you have positioned. This natural separation is what makes harvesting so easy.
Using a length of rigid airline tubing or a siphon, carefully draw the nauplii from the middle layer and pass them through a fine mesh sieve to separate them from the hatching water. Rinse the collected nauplii briefly under fresh water to remove any residual salt before feeding them to freshwater fish. For marine fish, rinsing is unnecessary and the salt water can go directly into the tank.
Salinity, Temperature and pH for Maximum Hatch Rates
Getting the water parameters right is the difference between a 50 percent hatch rate and a 90 percent hatch rate when you hatch brine shrimp at home. The three variables that matter most are salinity, temperature, and pH.
Salinity. The ideal range is 25 to 30 parts per thousand, which corresponds to a specific gravity of 1.018 to 1.022. Below 20 ppt, hatch rates drop significantly. Above 35 ppt, hatching slows down considerably. One tablespoon of marine salt per litre of water gets you into the right range without needing a hydrometer.
Temperature. Optimum is 26 to 28 degrees Celsius for a 24-hour complete hatch. At 22 to 24 degrees, expect 36 hours. At 18 to 22 degrees, you may need 48 hours or longer. Temperatures above 30 degrees will kill the nauplii.
pH. Brine shrimp eggs hatch best at pH 8.0 or higher. If your tap water is soft or acidic, add a quarter teaspoon of baking soda (sodium bicarbonate) per litre to raise the pH into the optimal range. Most marine salt mixes already buffer the water to around pH 8.2, so this is rarely an issue if you are using marine salt.
Comparing Brine Shrimp Egg Options
Not all brine shrimp eggs are the same when you hatch brine shrimp at home. Hatch rates, processing, and ease of harvesting vary significantly between options. Here is a quick reference to help you choose the right eggs for your needs.
| Egg Type | Hatch Rate | Shell Removal | Best For | Harvest Difficulty |
|---|---|---|---|---|
| Standard Brine Shrimp Eggs | 80-90% | No - requires separation | General fish feeding, hobbyist use | Moderate (must separate shells) |
| Premium 90% Hatch Rate Eggs | 90%+ | No - requires separation | Serious breeders, consistent results | Moderate (must separate shells) |
| Decapsulated Brine Shrimp Eggs | 85-90% | Yes - shell removed | Fry feeding, no shell contamination | Easy (no shells to remove) |
| Shelless Brine Shrimp Eggs | 85-90% | Yes - shell removed | Can be fed unhatched as a direct food | Very easy (direct feeding) |
| Low-Grade Commercial Eggs | 40-60% | No - requires separation | Not recommended | Difficult (poor yield) |
For most home aquarists learning how to hatch brine shrimp, premium 90 percent hatch rate eggs are the best starting point. They deliver consistent results and work with any standard hatchery setup. Decapsulated eggs are the better choice for breeders raising delicate fry, because there are no egg shells to accidentally feed to the fry, which can cause digestive blockages.
Decapsulated Brine Shrimp Eggs

£2.45
Decapsulated Brine Shrimp Eggs - No-Hatch Artemia Food Brine shrimp nauplii are one of the most widely used live foods in marine fish keeping. But getting them into the tank requires hatching eggs, separating nauplii from shells and unhatched cysts,… read more
Enriching Brine Shrimp for Better Nutrition
Freshly hatched brine shrimp are nutritious, but their nutritional value drops sharply after the first 12 hours as the nauplii consume their yolk sac. For most feeding purposes, using them within this window is enough. But for breeders and keepers of demanding species, enriching the nauplii before feeding dramatically improves their nutritional profile.
Enrichment is the process of feeding brine shrimp nauplii a high-nutrition food for several hours before harvesting them. The nauplii ingest the enrichment product, and its nutritional content transfers through to whatever fish eats them. This technique is sometimes called gut loading, and it is how commercial hatcheries turn basic brine shrimp into a premium feed.
Our Rotifer & Artemia Enrichment is a blend of marine microalgae specifically designed for enriching brine shrimp and rotifers with EPA, DHA, and essential fatty acids. Alternatively, dosing live phytoplankton directly into the hatchery water for four to six hours before harvest significantly boosts the nutritional content of the nauplii. This is the same principle that makes phytoplankton so important for reef tanks, and it applies equally to live food production.
Rotifer & Artemia Enrichment
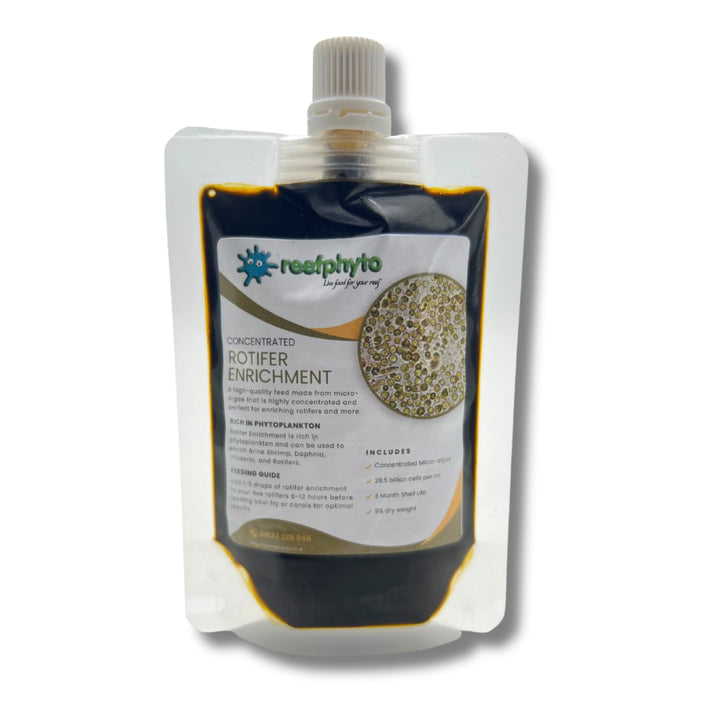
£6.70
Rotifer & Artemia Enrichment: Fuel, Enrich & Protect Your Larvae Your rotifers are alive. Your brine shrimp are hatching at a good rate. Your larval survival in the first week is reasonable. But somewhere between day five and day ten… read more
How Often to Hatch Brine Shrimp
How often you need to hatch brine shrimp depends on what you are feeding and how many fish you are maintaining. For a community tank or a single reef display, hatching brine shrimp once or twice a week provides plenty of live food for regular treat feeding. For breeding projects with active fry, daily hatches are essential because the fry need to eat baby brine shrimp multiple times a day during their critical early development.
Many serious breeders run two hatcheries on a rotating schedule. One hatchery is harvested in the morning while a second batch is hatching. This ensures a continuous supply of freshly hatched nauplii at peak nutritional value, with no gap between batches. If you are keeping clownfish breeding projects, this rotation is the standard approach.
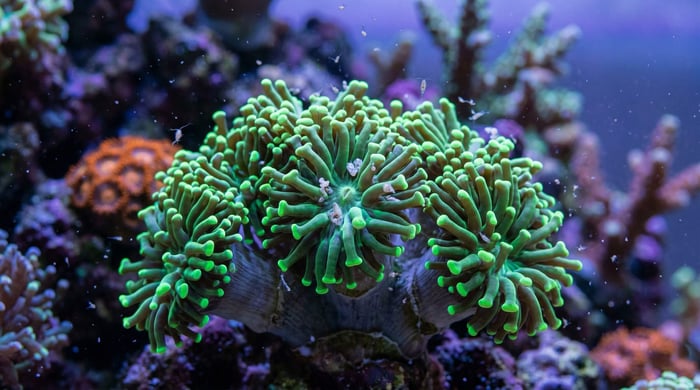
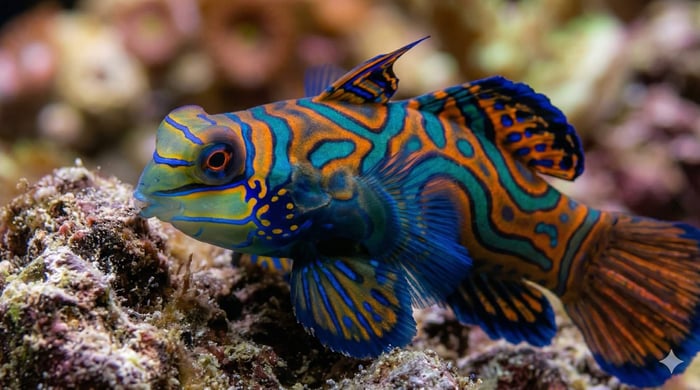
For mandarin dragonet keepers who want to supplement their copepod supply with brine shrimp, hatching a small batch every few days provides an additional live food option. However, brine shrimp alone are not a complete solution for mandarins, which still need copepods as their primary food source. Our mandarin dragonet care guide covers the full feeding strategy in detail.
Feeding Baby Brine Shrimp to Fish
Baby brine shrimp are an almost universal fish food. Marine and freshwater, tropical and coldwater, fry and adults, almost every fish in the hobby will eagerly consume freshly hatched nauplii. The feeding response is usually immediate and visibly enthusiastic, which is part of what makes knowing how to hatch brine shrimp so useful for conditioning breeding pairs and tempting finicky eaters.
To feed baby brine shrimp, use a pipette or turkey baster to draw a portion of the harvested nauplii from your sieve and release them directly into the tank. Turn off strong powerheads briefly so the fish have time to hunt before the nauplii are swept away. For fry in dedicated rearing tanks, target feeding with a pipette ensures the baby brine shrimp end up where the fry can find them.
Do not overfeed. Baby brine shrimp that are not eaten within a few hours will start to die and foul the water. Feed small amounts that are consumed quickly rather than dumping a whole batch at once. If you have hatched more than you need for a single feeding, the remaining nauplii can be refrigerated for 12 to 24 hours to slow their metabolism and preserve them for a second feeding.
Growing Brine Shrimp to Adult Size
While baby brine shrimp are the most nutritionally dense, growing them to adult size is also possible and useful for larger fish that cannot easily capture the tiny nauplii. Adult brine shrimp are around 8mm long and make an excellent food for adult reef fish, wrasses, anthias, and larger community fish.
To grow brine shrimp to adulthood, you need a larger vessel (at least 5 litres), gentle aeration, a consistent food source (phytoplankton is ideal), and temperatures of 22 to 28 degrees Celsius. The process takes two to three weeks from hatch to harvestable adult size. Most home aquarists do not bother with this, since adult brine shrimp are widely available live or frozen, but for keepers who want complete control over their live food supply, it is a practical option.
Our Hobby Artemia Brine Shrimp Breeder is a dedicated vessel designed for growing brine shrimp from hatchling to adult, making the process straightforward even for beginners.
Common Problems When Hatching Brine Shrimp
After 18 years of advising hobbyists on how to hatch brine shrimp, certain problems come up repeatedly. Here are the most common issues and how to fix them.
Low hatch rate. The most common cause is poor quality eggs. Cheap eggs often have hatch rates of 40 to 60 percent, which feels like the process is failing when it is actually the eggs letting you down. Switch to premium grade eggs with a stated hatch rate of 90 percent. Other causes include salinity that is too high or too low, water that is too cold, pH below 7.5, or insufficient aeration causing eggs to settle on the bottom.
Eggs settling on the bottom. Your aeration is too weak. Increase the air flow until the eggs are constantly circulating in the water column. If using a soft bottle setup, consider switching to a purpose-built hatchery with a conical base that keeps eggs suspended naturally.
Bad smell from the hatchery. This indicates bacterial contamination or eggs that have died without hatching and are now decomposing. Start a fresh batch with clean equipment and new saltwater. Clean your hatchery thoroughly between batches to prevent recurring issues.
Nauplii dying quickly after hatching. Usually caused by temperature that is too high or ammonia buildup in the hatching water. Harvest nauplii within a few hours of hatching and do not leave them in the hatching vessel for extended periods. If you want to store them for later, refrigerate them in clean saltwater.
Cannot separate nauplii from shells. Turn off the air pump and wait longer. The layers need five to ten minutes to form properly. If shells and nauplii are mixing, there is too much residual water movement. Be patient and let the separation happen naturally. Alternatively, use decapsulated eggs which eliminate the problem entirely.
Building a Complete Live Food System
Learning how to hatch brine shrimp is one piece of a broader live food strategy. The most successful fish keepers combine multiple live food sources to cover the full nutritional spectrum their fish need.
Live phytoplankton is the foundation. It feeds copepod and rotifer cultures, enriches brine shrimp, and directly feeds corals and filter feeders. Without phytoplankton, the entire live food chain runs out of nutritional input.
Live rotifers are the first food for marine fry, bridging the gap between yolk sac absorption and the fry being able to eat baby brine shrimp. Clownfish breeders cannot succeed without them.
Baby brine shrimp take over from rotifers once fry are large enough to capture them. They continue to be useful throughout a fish's life as a treat food and for conditioning breeding pairs.
Live copepods are the ongoing live food that reef tanks depend on for mandarin dragonets, wrasses, and broader microfauna support. Our copepod culture guide covers how to produce these at home.
For reef keepers who want the full live food system in a single solution, our Zooplankton Multipack combines copepods, rotifers, and phytoplankton in one order.
Mastering how to hatch brine shrimp gives you an affordable, reliable, and nutritionally powerful live food that complements everything else in your live food programme. It takes 24 hours, costs pence per hatch, and delivers results that frozen and dried alternatives simply cannot match.
For a printable version of this guide that you can keep next to your hatchery, download the complete Brine Shrimp Hatching Guide PDF. For product recommendations and a quick-reference version of the hatching process, visit our brine shrimp hatching page.
If you have questions about hatching brine shrimp, choosing the right eggs, or building a complete live food system for your fish, get in touch. I answer every message personally.
Darren
Founder, Reefphyto Ltd - Wales, UK - Est. 2008