
Quick Navigation
- What a Refugium Actually Does for Your Reef Tank
- Where to Put Your Refugium
- How to Set Up a Refugium Step by Step
- Feeding Your Refugium with Phytoplankton
- How to Know Your Refugium Is Working
- Refugium Maintenance - Keeping It Running
- The Refugium and Live Food Connection
- Common Refugium Mistakes and How to Avoid Them
- Building a Complete Refugium Live Food System
- FAQs
If you want to know how to set up a refugium that actually works, you are in the right place. Whether your goal is natural nutrient export, a self-sustaining copepod population, or both, the process is more straightforward than most people expect. The refugiums that deliver results all share the same qualities: the right habitat, the right biology, and a keeper who understands that a refugium is a living system that gives back exactly what you put in.
I have been working with refugium systems and culturing live copepods professionally in Wales for over 18 years. This guide covers everything you need to know to set up a refugium from scratch, stock it with copepods and macroalgae, feed it properly, and maintain it long-term. If you have tried a refugium before and been disappointed, or if you are planning your first one, this is the guide I wish every reef keeper had before they started.
What a Refugium Actually Does for Your Reef Tank
A refugium is a protected area connected to your main reef system where beneficial organisms can grow and reproduce without being eaten by fish or destroyed by filtration equipment. The word itself means refuge, and that is exactly the point. When you set up a refugium properly, it becomes a safe zone for the biological processes that keep your reef healthy behind the scenes.
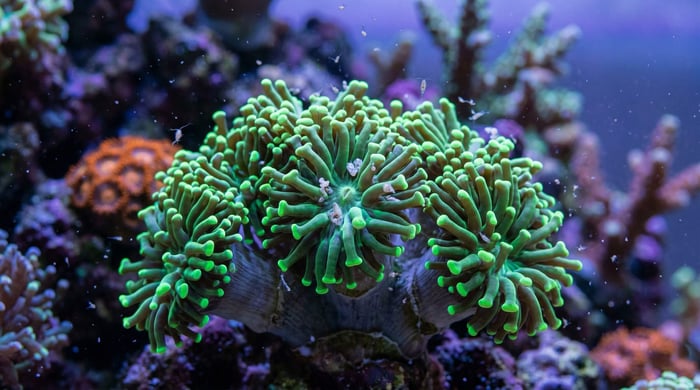
In practical terms, a well-run refugium does three things simultaneously. First, it exports nutrients. Macroalgae like Chaetomorpha (chaeto) absorbs nitrates and phosphates as it grows. When you harvest the chaeto, you physically remove those nutrients from your system. This is natural nutrient export, no chemicals, no reactors, no ongoing costs beyond a light and a ball of algae.
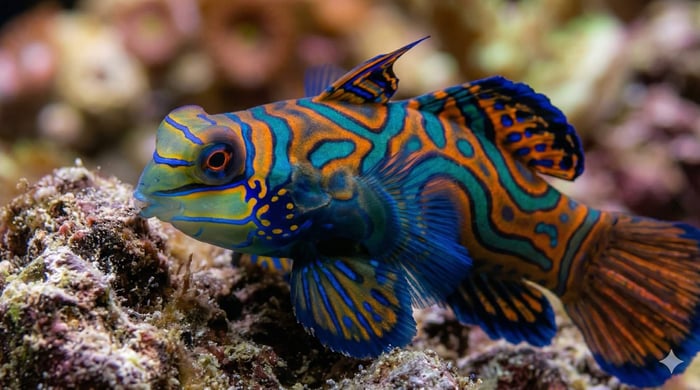
Second, a refugium produces live food. Copepods, amphipods and other microfauna breed in the sheltered environment and gradually seed your display tank through the return pump. This creates a continuous supply of live prey for your fish and corals without you needing to dose anything. For keepers with mandarin dragonets, wrasses, pipefish or seahorses, this is not a luxury. It is the difference between a fish that thrives and one that slowly declines.
Third, a refugium increases the total water volume and biological filtration capacity of your system. More water means greater stability. More surface area for beneficial bacteria means better processing of ammonia and nitrite. Every reef keeper who takes the time to set up a refugium properly sees the benefits across their entire system.
Where to Put Your Refugium
The most common and practical location for a refugium is inside your sump. Many modern sumps are designed with a dedicated refugium compartment, but even if yours is not, you can section off a portion of the sump with baffles or egg crate to create a suitable space. The key consideration when you set up a refugium in a sump is positioning. Ideally, your refugium section should sit after your protein skimmer and mechanical filtration but before the return pump. This means the copepods and other organisms produced in the refugium travel directly into the display tank rather than being destroyed by the skimmer or trapped in filter socks.
If you do not have a sump, you still have options. Hang-on-back refugiums work well for smaller systems and nano tanks. Some keepers convert a rear chamber in an all-in-one tank into a mini refugium. You can even run a separate standalone container as a remote refugium, connected to the main tank with a small pump. The principles are the same regardless of format. What matters is that the refugium receives water from the display, processes it through macroalgae and microfauna, and returns it.
For nano reef keepers without space for a traditional refugium, adding a PodHide Nano directly into the display tank can replicate some of the copepod breeding benefits of a refugium by giving pods a protected space to establish and reproduce. It is not a full replacement for nutrient export, but it solves the pod disappearance problem that frustrates so many nano keepers.
Reefphyto PodHide – Reef Tank Copepod Shelter & Breeding Station

£28.95
Reefphyto PodHide: Reef Tank Copepod Shelter & Breeding Station You added copepods three weeks ago. The mandarin hunted well for a few days. The wrasse picked through the rockwork with obvious interest. Then the activity slowed, the hunting behaviour became… read more
How to Set Up a Refugium Step by Step
Learning how to set up a refugium is straightforward once you understand the components. You do not need expensive equipment or specialist knowledge. What you need is the right habitat, the right organisms, and a consistent routine. Here is the step-by-step process I recommend to every reef keeper.
Step 1 - Prepare the Chamber
Turn off your return pump so nothing gets flushed into the display while you work. Clean the refugium section thoroughly. If you are working in an existing sump, remove any debris or old filter media from the area you are converting.
Step 2 - Add Substrate (Optional but Recommended)
A thin layer of sand or refugium mud, around 25 to 50mm deep, provides habitat for benthic copepods and other microfauna. It also creates anaerobic zones that support denitrifying bacteria, which convert nitrate into harmless nitrogen gas. Aragonite sand works well. You do not need a deep sand bed. A shallow layer is enough to provide surface area and habitat without creating maintenance problems.
Step 3 - Add Structure
Copepods need surfaces to cling to, graze on and reproduce against. Chaeto provides some of this, but adding rubble rock, ceramic media or a dedicated copepod shelter like the Reefphyto PodHide dramatically increases the available surface area. More surface area means a larger, more productive copepod population. Avoid using uncured live rock in a refugium. It introduces unpredictable hitchhikers and adds unnecessary risk. Clean rubble or porous ceramic media is a better choice.
Step 4 - Add Macroalgae
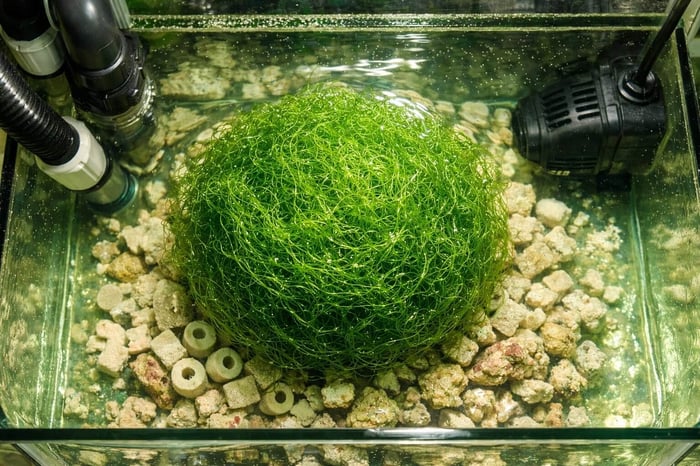
Chaetomorpha is the standard refugium macroalgae for good reason. It grows fast, absorbs nitrates and phosphates efficiently, does not go sexual the way Caulerpa species can, and provides excellent habitat for copepods. A golf ball sized portion is enough to start. It will grow quickly under the right light. Place the chaeto loosely in the refugium. Some keepers let it tumble gently in the flow. Others contain it in a basket or cage to make harvesting easier. Either approach works.
Step 5 - Install Lighting
Your refugium macroalgae needs light to grow. A dedicated refugium light or a simple LED grow light in the 6500K to 10000K range is ideal. Many reef keepers run their refugium light on a reverse cycle, turning it on when the display lights go off. This helps stabilise pH overnight because the macroalgae continues consuming CO2 and producing oxygen while the corals in the display are not photosynthesising. A reverse light cycle is not essential, but it is a useful benefit.
Step 6 - Establish Flow
The refugium needs water movement, but not blast flow. The goal is gentle turnover that keeps food particles suspended and prevents stagnation without creating currents strong enough to flush copepods straight through the chamber. As a general guide, aim for the refugium volume to turn over once every one to two hours. If detritus is settling into a stagnant mat, flow is too low. If every particle and organism is being swept straight through to the return pump, flow is too high.
Step 7 - Seed with Copepods
Once your refugium is set up, the water is flowing and the chaeto is in place, it is time to add live copepods. This is the step that turns a refugium from a simple algae scrubber into a genuine live food production system. Add them at night when the fish in your display are less active. Float the sealed bag in the sump for 10 to 15 minutes to match temperature, then pour the copepods gently into the refugium, directing them towards the substrate and structure where they can settle in. Avoid pouring them directly into a high-flow area.
If you are also establishing copepods in the display tank, split the culture. Add half to the refugium and half to the display. The refugium population will act as your long-term breeding colony, continuously seeding the display through the return pump. For keepers who want a convenient way to top up their refugium copepod population between full culture additions, the Pod-Shot concentrated copepod pouch is a quick and easy option.
Step 8 - Feed the Refugium
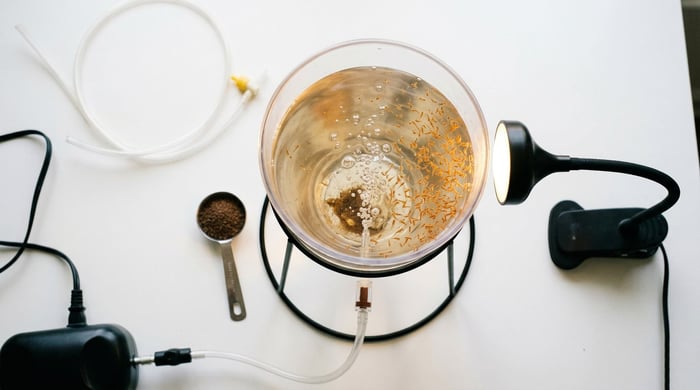
This is where most refugiums underperform. Copepods do not reproduce well in a clean, food-limited chamber just because there is chaeto present. They need feeding. Live phytoplankton is the best food source for a refugium copepod population. Dose a small amount directly into the refugium daily or every other day. The phytoplankton feeds the copepods, supports microbial biofilms that copepods graze on, and is consumed by filter-feeding organisms throughout the system.
Start with small doses and observe. If the water clears quickly and you see increasing copepod activity, you can scale up. If the refugium stays cloudy for extended periods, reduce the amount. For keepers who want a phytoplankton blend specifically formulated for copepod culture nutrition, our Copepod Feed provides the microalgae species that harpacticoid copepods respond to best.
Feeding Your Refugium with Phytoplankton
Phytoplankton is the engine that drives refugium productivity. Without it, your copepod population will plateau or decline. With it, the refugium becomes a genuine biological factory that produces live food continuously. This is a critical part of understanding how to set up a refugium that sustains itself long-term rather than one that disappoints after the first few weeks.
The connection is direct. Phytoplankton feeds copepods. Copepods feed your fish and corals. The nutritional profile of the phytoplankton you dose directly influences the nutritional quality of the copepods your tank receives. This is why using live phytoplankton matters more than bottled or preserved alternatives. Live phyto is metabolically active, rich in EPA, DHA and essential fatty acids, and immediately available to the food web in your refugium.
For reef tanks where you want the phytoplankton to benefit both the refugium copepod population and the corals and filter feeders in the display, our 5 Species Phytoplankton blend covers the full nutritional range. It combines Nannochloropsis oculata, Nannochloropsis gaditana, Tetraselmis suecica, Pavlova and Thalassiosira weissflogii to provide everything from fine-particle nutrition for filter feeders to lipid-rich feed for copepods.
If you are interested in culturing your own phytoplankton to feed the refugium long-term, our Phytoplankton Culture Kit includes a live starter culture, nutrient medium and everything you need to maintain a continuous supply.
5 Species Phytoplankton

£6.99
5 Species Phytoplankton Blend: Build a Thriving Marine Ecosystem Your corals are open, your fish are healthy, and your parameters are clean. But something about the tank feels thin. The microfauna community never quite established. Your copepod population does not… read more
How to Know Your Refugium Is Working
A healthy, productive refugium shows clear signs that tell you everything is on track. The chaeto grows visibly between harvests. You can see copepods on the glass of the refugium chamber, particularly at night under torchlight. Your display tank benefits from lower nitrate and phosphate levels without increased water changes. Fish that hunt live prey, particularly wrasses and dragonets, show natural foraging behaviour rather than the listless searching that indicates a depleted pod population.
The timeline varies. Chaeto typically begins growing noticeably within the first two weeks under adequate lighting. A copepod population usually takes four to eight weeks to establish to the point where you see regular activity. Full refugium maturity, where the system is producing enough copepods to meaningfully seed the display and exporting nutrients consistently, generally takes two to three months.
Patience matters here. The biggest mistake I see is keepers judging their refugium too early. A refugium that looks quiet at week two can be thriving at week six. Give the biology time to establish before making changes.
Refugium Maintenance - Keeping It Running
Once you set up a refugium and it matures, it requires very little ongoing work. The main tasks are harvesting chaeto, feeding copepods and occasional cleaning.
Harvest your chaeto every two to four weeks, or whenever it fills the refugium chamber. Remove roughly half and discard it or pass it on to another reef keeper. This is how nutrient export works. The chaeto locked up nitrates and phosphates as it grew. By removing the chaeto, you remove those nutrients permanently from your system.
Continue dosing live phytoplankton regularly to sustain the copepod population. In a mature, well-fed refugium, the copepods will also graze on detritus, biofilms and organic matter that flows in from the display, which reduces their dependence on phytoplankton dosing over time. But in the early months, consistent feeding is what drives population growth.
Every few months, gently siphon any accumulated detritus from the refugium substrate. A small amount of detritus is normal and beneficial as it feeds the microfauna. Excessive buildup can create water quality issues. Use a turkey baster or small siphon to remove the worst of it without disturbing the entire bed.
The Refugium and Live Food Connection
If you have read this far, you already understand that knowing how to set up a refugium is about more than just nutrient export. A refugium is the foundation of a live food system. The copepods, amphipods and other microfauna that breed in your refugium provide something that no frozen food, pellet or liquid supplement can replicate: live, nutritionally complete prey that your fish and corals evolved to consume.
For mandarin dragonets, this is particularly critical. Mandarins are obligate live feeders. They will not accept anything that is not alive and moving. A well-stocked refugium with a thriving copepod population is the only reliable long-term solution for keeping a mandarin healthy in a home aquarium. If you are planning to keep a mandarin, setting up your refugium and establishing a copepod population months before the fish arrives is the single most important preparation you can make.
The same principle applies, to a lesser degree, to wrasses, pipefish, seahorses and many coral species. Live copepods benefit your reef tank in ways that go well beyond feeding a single fish. They clean surfaces, process detritus, and provide the zooplankton component that corals capture with their polyps at night. When you set up a refugium with copepod production as a core goal, all of this happens automatically, without you needing to dose live food on a schedule.
For keepers who want to accelerate the process or who keep particularly demanding livestock, combining a refugium with regular additions of Live Zooplankton (a balanced mix of copepods and rotifers) provides both immediate feeding and long-term population building. The refugium does the background work. The live food additions handle the peaks in demand.
Live Copepods
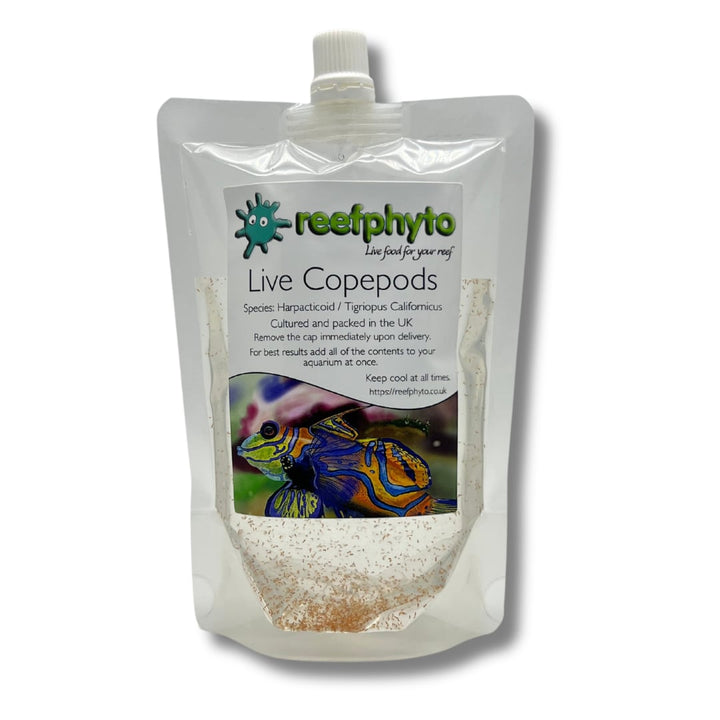
£11.99
Live Copepods UK: Tigriopus californicus, Cultured Fresh in Wales by Reefphyto Your reef looks right on paper. Clean water, stable parameters, good equipment. But something is still off. Your fish are pale, your mandarin is wasting, your corals are feeding… read more
Common Refugium Mistakes and How to Avoid Them
After 18 years of advising reef keepers on how to set up a refugium and troubleshooting the ones that underperform, the same mistakes come up repeatedly. Here are the ones that matter most.
Too much flow. A refugium is not a display tank. Strong flow sweeps copepods straight through the chamber before they can establish. Gentle turnover is all you need.
No dedicated feeding. Relying on detritus alone to feed your copepod population works in a heavily stocked, mature system. In most tanks, and especially in new refugiums, you need to actively feed with live phytoplankton to get the population growing.
Not enough surface area. A bare refugium chamber with a ball of chaeto floating in it will grow some copepods, but nothing like the numbers you get when you add rubble, ceramic media or a PodHide. Surface area is directly proportional to copepod production.
Aggressive mechanical filtration between refugium and display. Filter socks, roller mats and fine mesh placed directly after the refugium intercept copepods before they reach the display. If your goal is pod production, position your mechanical filtration before the refugium rather than after it.
Starting the refugium too early in a new tank. Let your tank complete its initial cycle and build some nutrient load before introducing macroalgae. If the chaeto strips all the available nitrate and phosphate from a new system, you can trigger a dinoflagellate outbreak. Wait until your system has fish and a measurable nutrient baseline before lighting the refugium.
Giving up too early. A refugium takes time to mature. If you do not see copepods crawling on the glass after one week, that does not mean the setup has failed. Give it six to eight weeks before drawing conclusions.
Building a Complete Refugium Live Food System
The most effective refugiums are not isolated compartments. They are part of a connected live food system where each element supports the others. Understanding how to set up a refugium within this wider system is what separates reef keepers who see dramatic results from those who are left wondering what went wrong.
Live phytoplankton feeds the copepods in the refugium and directly nourishes corals, filter feeders and invertebrates in the display. Live copepods seed the refugium and establish a breeding population. The copepods feed your fish naturally and provide zooplankton for coral nutrition. A PodHide in the refugium or display tank gives copepods the structure they need to establish without being wiped out by predation.
For keepers who want to take it further, culturing your own copepods in a standalone vessel alongside your refugium gives you complete control over your live food supply. Our Copepod Culture Kit provides everything you need to start, and our complete guide to culturing copepods at home walks through the process in detail.
If you also breed fish or keep species that require very small live prey, adding live rotifers to the system fills the gap between phytoplankton and adult copepods. Rotifers are the essential first food for marine fry and an excellent supplementary feed for corals and filter feeders in any reef tank.
The refugium ties all of this together. It is the heart of the system, the place where biology does the heavy lifting so you can spend less time managing and more time enjoying your reef.
If you have questions about how to set up a refugium or choosing the right live food for your system, get in touch. I answer every message personally.
Darren
Founder, Reefphyto Ltd - Wales, UK - Est. 2008