Quick Navigation
- What the nitrogen cycle actually is
- What you need before you begin
- Step one: choose your rock route
- Step two: how to cycle a marine aquarium without fish
- Step three: build the living side of the tank
- Your live food schedule: what to feed a new marine tank and when
- Step four: get through the ugly stage
- Step five: stock slowly
- Mistakes I see most often when people learn how to cycle a marine aquarium
- How to cycle a marine aquarium: the short version
- FAQs
Learning how to cycle a marine aquarium is the single most important thing you will do to your tank, and it is the one thing you cannot rush, buy your way out of, or fix later. Everything that follows depends on getting it right. The good news is that it is not complicated once you understand what is actually happening.
I have been culturing live marine foods in Wales since 2008, and in that time the question I get asked most often is not about copepods or phytoplankton. It is some version of "is my tank ready yet?" So I have written down how to cycle a marine aquarium properly, once, so I can hand it to anyone who asks.
I have written it to be honest rather than promotional. Where our products genuinely help, I have said so and told you exactly when to use them. Where they do not help, I have said that too. Live food does not cycle a tank, and anyone who tells you otherwise is selling you something.
Read this before you order anything from us
Do not add live foods while ammonia or nitrite are showing on your test kit. Copepods, rotifers and phytoplankton are not nitrifying bacteria. They will not process ammonia, they will not speed your cycle up, and they will die in a cycling tank and add to the load you are trying to clear.
The rule is one line: no live foods go in until ammonia and nitrite both read zero 24 hours after a 2 ppm ammonia dose, and the final water change has been done. Not when nitrite first touches zero, not when things look about right. That one test and that one water change are the gate for everything.
What the nitrogen cycle actually is
Fish, invertebrates and uneaten food all produce ammonia. Ammonia is highly toxic to marine life. Even at very low concentrations it burns gills, suppresses the immune system, and kills. In a healthy tank you never see it, because two groups of bacteria are constantly converting it into something harmless.
One thing worth understanding early: ammonia becomes more dangerous as pH rises. Total ammonia exists as a mixture of ammonium (NH4+), which is relatively harmless, and free ammonia (NH3), which is the toxic form. The higher the pH, the greater the proportion sitting as free ammonia. Marine tanks run at pH 8.1 to 8.4, which is far higher than freshwater, so an ammonia reading that a freshwater keeper might shrug at is genuinely dangerous in a reef. Take any ammonia reading seriously.
The chain works like this:
| Stage | What happens | Why it matters to you |
|---|---|---|
| Ammonia NH3 / NH4+ | Produced by livestock, decaying food and dying organisms. | Lethal. Target reading is always zero. |
| Nitrite NO2- | Nitrosomonas-type bacteria convert ammonia into nitrite. | Still toxic. Target reading is always zero. |
| Nitrate NO3- | Nitrobacter and Nitrospira-type bacteria convert nitrite into nitrate. | Relatively harmless at reef levels. Removed by water changes, macroalgae, or anaerobic bacteria deep in rock and sand. |
Cycling simply means growing enough of those bacteria, on enough surface area, to handle the ammonia your tank will produce. That is it. You are not cycling the water. You are cycling the surfaces, because that is where the bacteria live: rock, sand, ceramic media, sponge, glass, plumbing, and every wetted part of the system. Everything else in this guide follows from that one idea.
The most common misunderstanding
Nitrifying bacteria are not free-swimming. Adding bottled bacteria to a tank with almost no surface area gives you almost no biological filtration. This matters enormously for the no-rock setups covered later in this guide.
What you need before you begin
Water and salt
Start with RO or RO/DI water, not tap water. Tap water in most of the UK carries phosphate, nitrate, silicate and copper, and every one of those will cause you problems for months. Mix to a salinity of 35 ppt, which is a specific gravity of 1.026 at 25 °C. Mix the salt in a separate container with a powerhead until it is fully dissolved and clear before it goes anywhere near the tank.
Temperature, flow and light
Hold the tank at 25 to 26 °C. Nitrifying bacteria work fastest in that range and slow down noticeably below 21 °C. Run good flow from day one, because the bacteria need oxygen and they colonise surfaces that water actually reaches. Lighting is optional during the cycle. Bacteria do not need it. Running lights on a short photoperiod will bring the algae stages forward, which some people prefer to get out of the way early. Running them off will delay algae but not prevent it.
A proper test kit
Buy liquid reagent tests for ammonia, nitrite and nitrate. Marine test strips are not accurate enough to make decisions with, and during a cycle you are making decisions on small differences. Check the expiry date on the box. Also test pH and alkalinity, for reasons I will come to.
Ignore your nitrate readings until nitrite is zero
This catches almost everybody out. Many nitrate test kits are chemically confused by nitrite, and will report nitrate as far higher than it really is while a nitrite spike is running. Do not make any decision from a nitrate reading until nitrite has read zero. If your nitrate looks alarming mid-cycle, it is very probably the test, not the tank. Retest once nitrite clears and you will usually get a sensible number.
Keep alkalinity above 7 dKH
Nitrification consumes alkalinity. In a new tank with no coral demand and no dosing, a heavy cycle can pull alkalinity down far enough to stall the bacteria completely. If your cycle seems stuck with a stubborn nitrite reading, test alkalinity before you change anything else. If it has dropped below about 6 to 7 dKH, a water change or a small buffer addition usually restarts it within a day or two.
Step one: choose your rock route
Before we get to how to cycle a marine aquarium step by step, you need to settle the rock question. The rock you choose determines how long the cycle takes, how much biodiversity you start with, and what problems you inherit. There is no single right answer. There are three routes, and each has a real trade-off.
Route A: cycling with dry rock
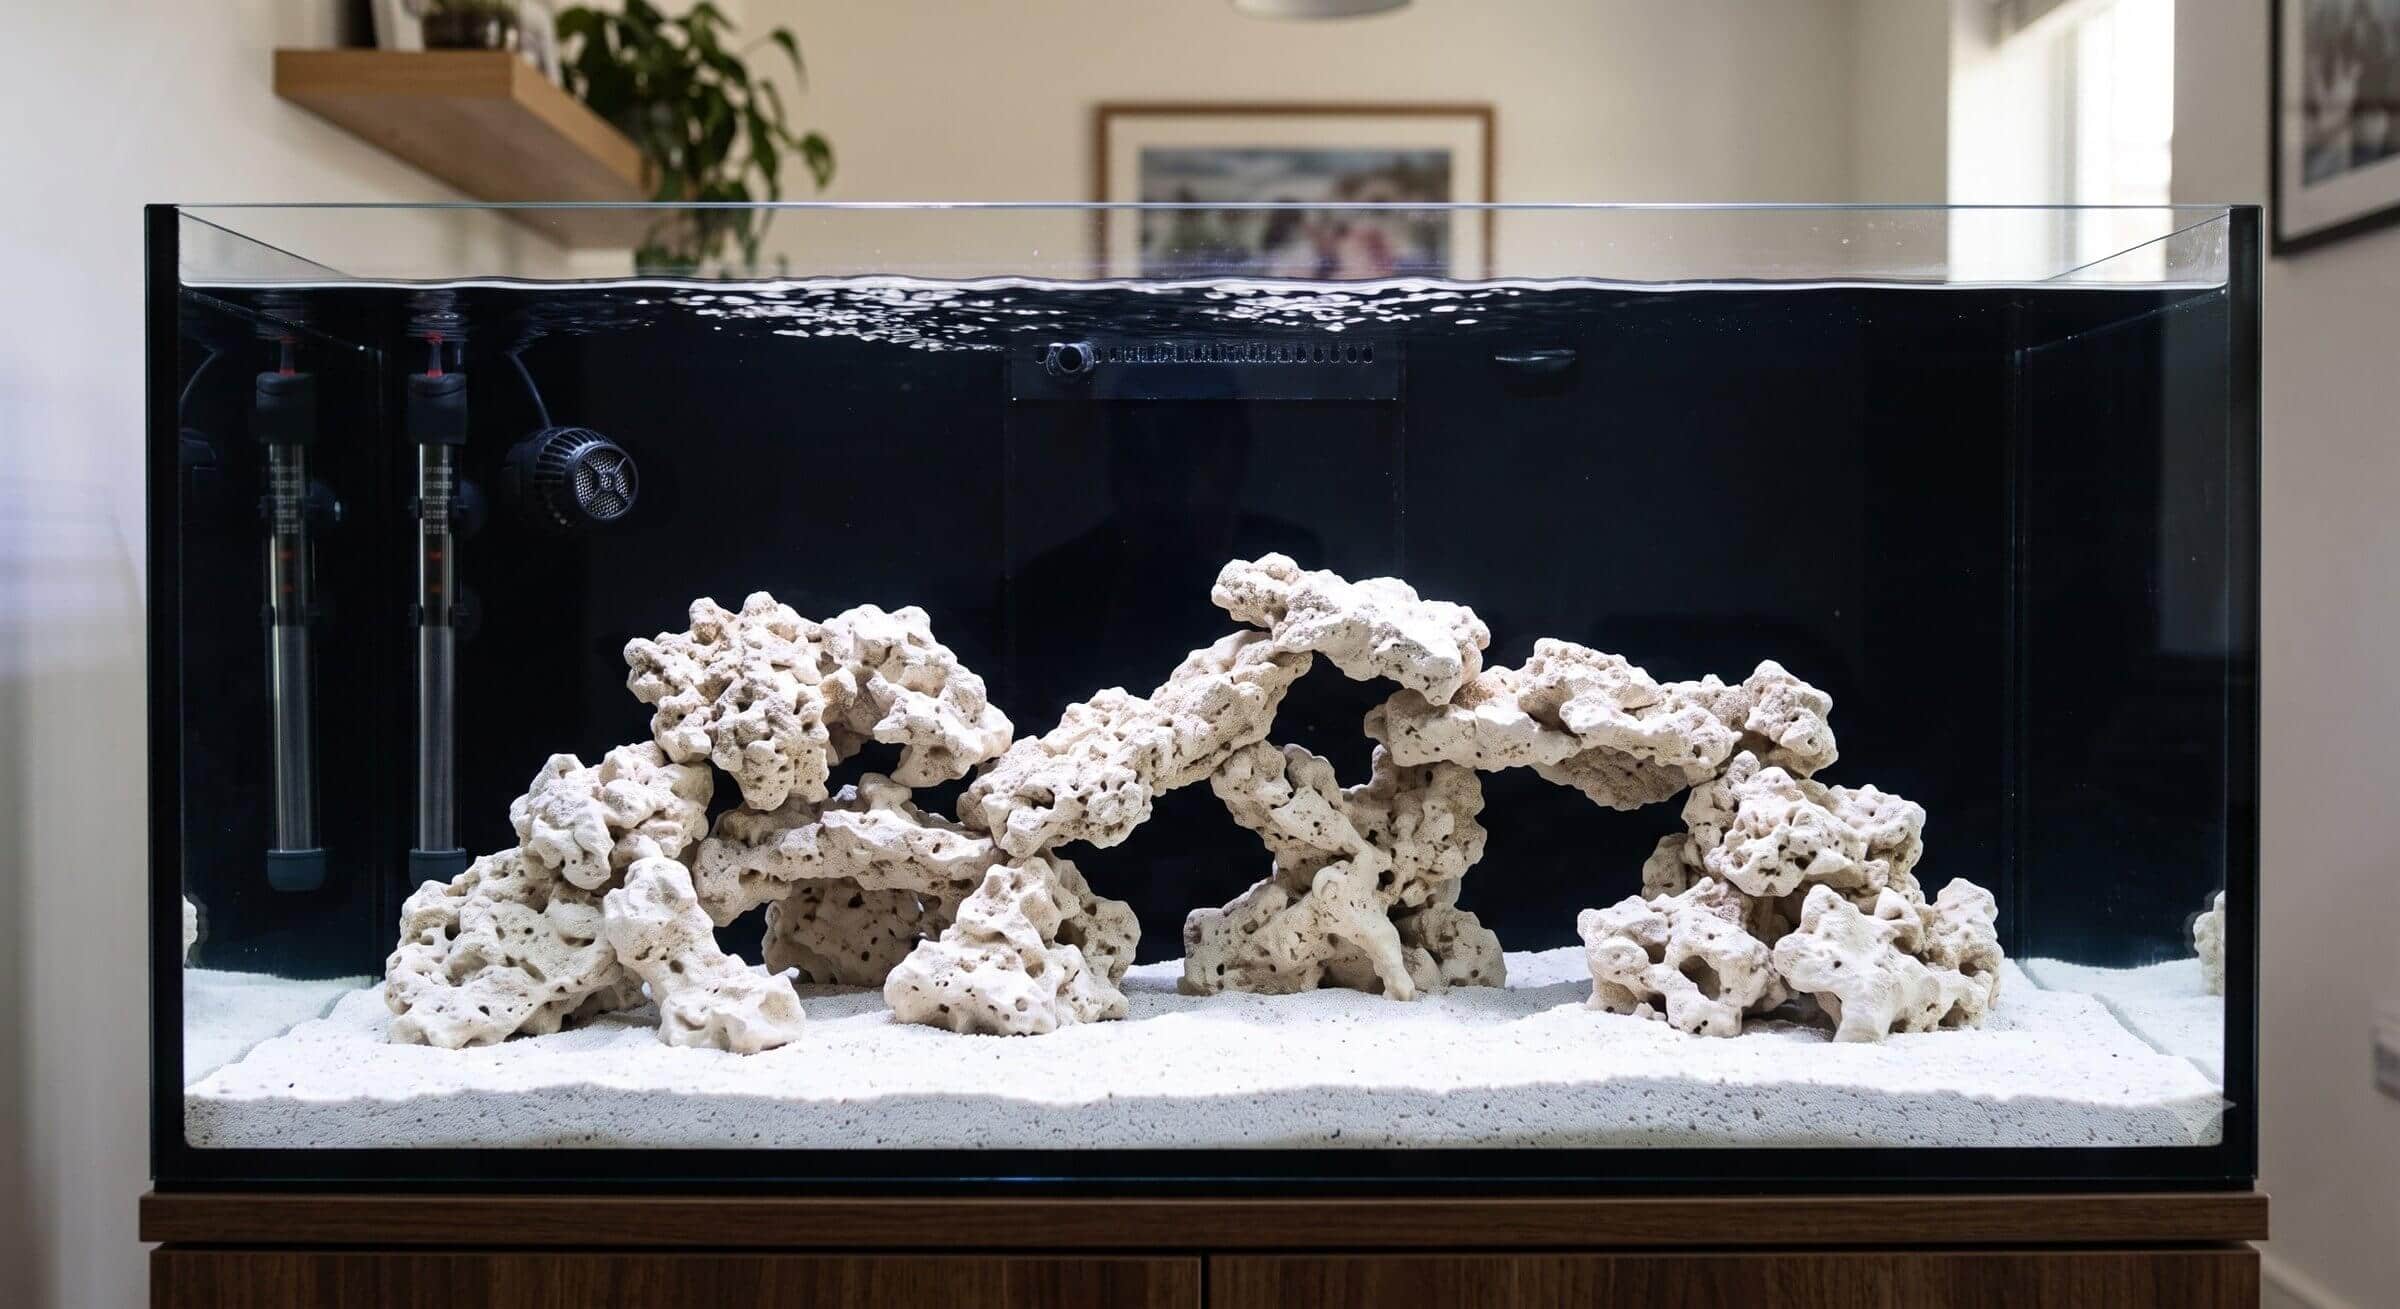
Dry rock is quarried or reclaimed aragonite with nothing living in or on it. It is now the most popular starting point in the UK, and for good reason. It arrives sterile, so you get no aiptasia, no vermetid snails, no bristleworm plagues and no hitchhiker crabs. You control exactly what enters your system.
The cost is time and sterility. Dry rock carries no nitrifying bacteria at all, so you are building the biological filter from nothing. It also carries no microfauna, which is the part most people overlook. A dry rock tank at six weeks is chemically capable of supporting fish and biologically almost empty.
One warning on reclaimed dry rock, meaning rock that was previously in a running tank and has since dried out. It is often loaded with bound phosphate, and it will leach that phosphate back into your water for months, feeding algae you cannot get on top of. If you are using reclaimed rock, either cure it in a bin of saltwater for several weeks with regular water changes and testing, or give it a dilute muriatic acid bath followed by a thorough rinse and neutralise. Freshly quarried dry rock does not usually need this.
If you are acid cleaning rock, please be careful
Acid cleaning is for confident users only. Do it outdoors, wear eye protection and chemical-resistant gloves, and always add the acid to the water and never the water to the acid. Neutralise thoroughly afterwards, then rinse and soak in fresh water with repeated changes until the water stays at a neutral pH. Never put acid-treated rock into a tank until it has been fully rinsed, neutralised and soaked. If any of that sounds like more than you want to take on, the slower curing route in a bin of saltwater works perfectly well and carries no risk.
Route B: cycling with live rock
Live rock is rock taken from an established system or from the ocean, still carrying bacteria, sponges, coralline algae, worms and copepods. It is the fastest route by a wide margin, and it is the only route that gives you real biodiversity on day one.
The distinction that matters is cured versus uncured. Cured live rock has already been through its die-off, usually in a shop's holding system, and is producing little or no ammonia. Move it quickly, keep it wet and warm, and a tank built on cured live rock can be through its cycle in one to three weeks. Uncured live rock has just been shipped and everything that died in transit is now rotting inside it. That produces a large, sustained ammonia spike, and it needs curing in a separate bin with strong flow, a heater and heavy water changes until ammonia and nitrite both read zero. That can take three to eight weeks.
The trade-off with live rock is pests. Aiptasia, majano anemones, mantis shrimp, gorilla crabs, vermetids and various flatworms all arrive this way. Some people accept that risk in exchange for the speed and the life. Some do not. Both positions are reasonable.
A note on bagged live sand
Customers ask about this constantly, so it is worth being clear. Bagged live sand does help. It provides real surface area, and it carries some bacteria that will give your cycle a head start. What it is not is a substitute for mature live rock, and it is certainly not a substitute for cycling.
Treat it as a mild seed and a bit of extra surface area, nothing more. It does not remove the need to dose ammonia and test through the full cycle, and it will not give you anything like the biodiversity that established live rock brings. Bags that have sat warm on a shop shelf for months carry very little live at all. Use it if you want it, then cycle exactly as you would have anyway.
Route C: cycling a tank with no rock at all
Plenty of good marine systems run with no display rock. Bare-bottom SPS grow-out tanks, frag systems, seahorse and pipefish tanks, quarantine and hospital tanks, breeding tanks and clean-look minimalist displays all fall into this category. The biology does not change. What changes is where you put it.
With no rock, you must deliberately provide the surface area that rock would normally have given you. Your options, roughly in order of how much biological capacity they deliver:
| Media | Where it goes | Notes |
|---|---|---|
| Sintered ceramic blocks or spheres | Sump, canister, or a media basket in the return chamber | Highest surface area per litre. The best single answer for a rock-free system. |
| Ceramic rings or sintered glass media | Sump chamber or external filter | Well proven, cheap, easy to add to gradually. |
| Sponge filter | In tank, air driven | Ideal for quarantine, hospital and fry tanks. Can be pre-seeded in an established system and moved across instantly. |
| Sand bed | Display or sump | Substantial surface area if you have it. Bare-bottom tanks lose this entirely. |
| Refugium with macroalgae | Sump | Handles nitrate and phosphate by export rather than by bacteria, and gives microfauna somewhere to live. |
| Rubble in a media bag | Sump or return chamber | Cheap and effective. Also the easiest way to add pod habitat to a rock-free system. |
Two things follow from having no rock. First, cycle the media, not the tank. You can cycle biomedia in a bucket or in the sump before the display is even filled, which is exactly how most quarantine setups are done. Second, a rock-free system has less biological reserve. Rock buffers you against mistakes because there is so much of it. Without it, an overfeed or a dead fish hits harder and faster. Stock more slowly, feed more carefully, and test more often than a rock-based tank would need.
Filter socks and floss are not biological filtration
They are mechanical. They trap detritus, and if you leave them in place they rot and add to your ammonia load rather than removing it. In a rock-free system especially, do not count them as part of your biological capacity.
Step two: how to cycle a marine aquarium without fish
This is the fishless method. It is kinder, more controllable and produces a stronger biological filter than cycling with livestock in the tank. Please do not cycle with fish. It is unnecessary and it is cruel.
1. Set up and stabilise
Fill with mixed saltwater at 35 ppt. Aquascape your rock, or install your biomedia. Get the heater to 25 to 26 °C and the flow running. Leave it for a day or two and confirm the temperature and salinity are holding steady. Take a baseline reading of ammonia, nitrite, nitrate, pH and alkalinity so you know your starting point.
2. Add an ammonia source
The bacteria need feeding. You have three options.
Pure ammonium chloride is what I recommend. It is clean, it is measurable, and it does not add phosphate. Dose to 2 ppm total ammonia and no higher. Above about 4 ppm you risk a nitrite level that inhibits the very bacteria you are trying to grow, which is the classic reason cycles stall for weeks.
A raw prawn works, using roughly one supermarket prawn per 40 to 50 litres, in a mesh bag so you can pull it out. It is free and it works, but you cannot control the dose, and it adds phosphate that will feed algae later.
Dried fish food works on the same principle with the same drawbacks. A pinch of flake or a few pellets every day or two, left to break down. Least controllable of the three, but perfectly workable.
Whichever you choose, do not use live food to cycle a tank. Copepods, rotifers and phytoplankton will not survive 2 ppm ammonia, and they are not what the nitrifying bacteria are waiting for.
3. Seed the bacteria
Left alone, the right bacteria will eventually arrive on their own from the air and from the salt mix, but that takes weeks. Seeding shortens the cycle substantially. In order of effectiveness: a handful of rubble or a sponge from a healthy established tank you trust; a piece of genuinely cured live rock; or a bottled nitrifying bacteria product. Bottled products vary a great deal in quality. Buy a reputable marine nitrifying bacteria product, check the date, and follow the storage instructions on the bottle, as some are refrigerated and some are deliberately shelf-stable. What you want to avoid is an old bottle that has been sitting hot or in direct sunlight, whatever the label says.
If you are seeding from another tank, remember you may also be importing pests and pathogens. Only take material from a system you would be happy to buy livestock from.
4. Watch the ammonia spike, then fall
Test every day or two. Ammonia climbs first, holds, then begins to drop as the first bacterial population catches up. On dry rock with a good seed this typically happens over days three to twelve. On unseeded dry rock it can take three weeks before you see any movement at all. That is normal. Do nothing except keep testing.
5. Watch the nitrite spike, then fall
As ammonia falls, nitrite rises. This is the long, boring part, and it is where most people lose their nerve. The nitrite-oxidising bacteria are slower growers than the ammonia oxidisers, so the nitrite phase usually lasts longer than the ammonia phase. Two to four weeks is completely normal. Keep dosing your ammonia source back up to 2 ppm each time ammonia reaches zero, so the bacteria you have grown do not starve while you wait.
6. Confirm with the 24-hour test
This is the only test that actually tells you the tank is cycled. Dose ammonia back up to 2 ppm in the evening. Test 24 hours later. If both ammonia and nitrite read zero, your tank is cycled. If either one shows a reading, you are not there yet. Wait, redose, and repeat in a few days. Do not stock on the strength of a single low ammonia reading.
7. Water change, then start slowly
By the end of a cycle nitrate is usually high, often 40 ppm or more, and phosphate may be elevated too. Do a large water change, 50 percent or more, to bring both down before you add anything. Then start the maturation phase described below.
Be clear about what you have just achieved. A cycled tank is ready for its first careful livestock additions. It is not ready for full stocking, and it is not ready for sensitive species. All you have proved is that the tank can now process ammonia. You have not yet built a mature reef.
This point, the passed 24-hour test plus the completed water change, is also the gate for live foods. Nothing live goes in before it.
How long does it take to cycle a marine aquarium?
| Starting point | Cycle complete | Notes |
|---|---|---|
| Cured live rock | 1 to 3 weeks | Sometimes almost immediate. Still run the 24-hour test. |
| Uncured live rock | 3 to 8 weeks | Large die-off. Cure separately if you can. |
| Dry rock plus bacteria seed | 2 to 5 weeks | The most common route. Quality of the seed makes the difference. |
| Dry rock, no seed | 4 to 10 weeks | Slow but perfectly reliable. Patience only. |
| No rock, cycled biomedia | Instant to 2 weeks | If media was pre-seeded in a running system. |
| No rock, fresh biomedia | 3 to 6 weeks | Cycle the media in a bucket or sump while the display sits empty. |
Cycled does not mean ready for everything
This is the single most common misunderstanding I hear, and it costs people livestock. Passing the 24-hour test means your tank can process ammonia. It does not mean the tank is mature.
A cycled tank is ready for its first careful livestock additions, not for full stocking or sensitive species. Full biological maturity, meaning stable nutrients, an established microfauna population and rock surfaces colonised well enough to resist algae, takes six to twelve months. Mandarins, SPS, anthias and most wild-caught specialists belong at the far end of that window, not the near end. This is why tanks get easier over time, and why patience in the first year pays for itself many times over.
Step three: build the living side of the tank
Here is the part that separates a tank that survives from a tank that thrives, and it is where our products actually belong. Once ammonia and nitrite are handled, you have a chemically safe box of water with almost nothing living in it. In a dry rock or rock-free system there is genuinely nothing: no copepods, no worms, no microfauna, no food web at all.
The window immediately after the cycle finishes and before you add fish is the single best opportunity you will ever get to build that food web, because there is nothing in the tank eating it. Miss this window and you spend the next two years trying to establish a copepod population against a tank full of hungry wrasse. Use it, and the population is entrenched before the first predator arrives.
Being straight with you
Phytoplankton, copepods and rotifers do not cycle a tank. They are not nitrifying bacteria and they will not process ammonia for you. Adding them during the ammonia or nitrite spike will simply kill them and add to the organic load. Nothing in this section goes in until ammonia and nitrite both read zero 24 hours after a 2 ppm ammonia dose, and the final water change has been done.
Be strict about this. It is tempting to start phytoplankton as soon as nitrite first reads zero, but until you have run the final 2 ppm challenge you do not actually know the tank can clear it, and you may be dosing phyto into water that is about to show ammonia again. Finish the test, do the water change, then start.
Test passed and water change done: start phytoplankton
Phytoplankton is the base of the marine food chain. Nothing above it exists without it. Once the 24-hour test has passed and the big water change is done, a light phytoplankton dose gets the base layer in place, feeds the bacterial and detritivore populations that are just getting going, and gives the copepods you add next something to eat the moment they arrive.
5 Species Phytoplankton

£6.99
5 Species Phytoplankton Blend: Build a Thriving Marine Ecosystem Your corals are open, your fish are healthy, and your parameters are clean. But something about the tank feels thin. The microfauna community never quite established. Your copepod population does not… read more
Where we fit
5 Species Phytoplankton is the one I would start with. It blends Nannochloropsis oculata, Tetraselmis, Isochrysis, Pavlova and Thalassiosira weissflogii, which spans roughly 1 to 20 microns, so it feeds everything from bacteria and copepod nauplii up to sponges and adult filter feeders. Dose at 1 ml per 27 litres daily for light feeding, 1 ml per 18 litres for medium, and 1 ml per 9 litres for heavy reef feeding. During the maturation phase, start at the light rate and build up.
If you would rather try a small amount first, the Phyto Shot is a ready-to-use pouch with no commitment. There is also a dosing calculator on our site that will give you the exact figure for your tank volume.
Same window, before any fish: add copepods
This is the highest-value thing you can do at this stage, and almost nobody does it. Phytoplankton and copepods go in during the same window, days apart at most. Copepods added to a fishless, cycled tank have no predation pressure whatsoever. They breed, spread through the rock, colonise the sand bed and the sump, and build a standing population over the following weeks. By the time you add a wrasse or a mandarin, that population is self-sustaining rather than a single meal.
It matters more on dry rock than anywhere else. Live rock arrives with its own microfauna. Dry rock arrives with none, and if you never deliberately add it, you never get it.
Where we fit
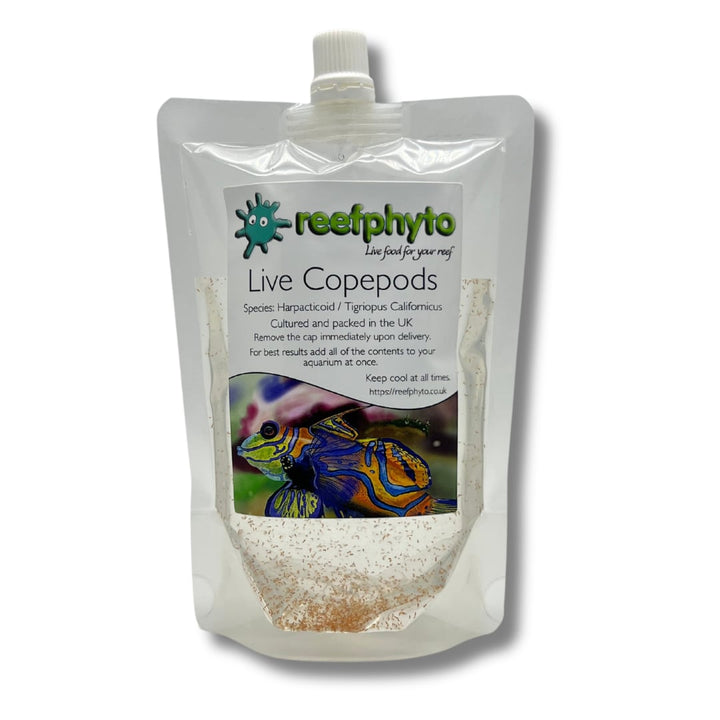
Live Copepods are Tigriopus californicus, a hardy harpacticoid of 1 to 3 mm, cultured here in Wales. They graze biofilm and detritus, they breed readily in a reef tank, and they are the founding population for your refugium. Available in 100 ml through to 1000 ml, so match the volume to your tank size and be generous. This is a one-off investment in a population, not a feed.
If your tank is bare-bottom, rock-free, or built on smooth new dry rock with few crevices, the PodHide and Copepod Bundle solves the specific problem those setups have. Pods need somewhere sheltered to breed. The PodHide is a reef-safe 3D-printed shelter with a multi-hole textured interior that gives them protected structure to colonise, so the population establishes instead of vanishing. In a no-rock system it is the difference between pods that persist and pods that disappear in a fortnight.
Live Copepods
£11.99
Live Copepods UK: Tigriopus californicus, Cultured Fresh in Wales by Reefphyto Your reef looks right on paper. Clean water, stable parameters, good equipment. But something is still off. Your fish are pale, your mandarin is wasting, your corals are feeding… read more
If you are adding corals or filter feeders early
Many people put a few soft corals in during the maturation phase. Corals, sponges, feather dusters, clams and tunicates all feed on particles far smaller than anything you can offer them dry, and in a young tank with no established plankton there is essentially nothing in the water for them.
Where we fit
Live Rotifers (Brachionus plicatilis, L-strain, 90 to 360 microns) sit in the size band between phytoplankton and copepods, which is exactly the band most LPS and filter feeders target. The Roti-Shot pouch is the easy way to add them on demand without running a culture.
If you would rather cover the whole size range in one addition, Live Zooplankton combines copepods and rotifers in a single 90 to 400 micron blend, and Zoo-Shot is the ready-to-use version for coral feeding days.
Once fish go in
From the moment you add fish, your copepod population is under pressure. A single six-line wrasse will work through an unprotected population faster than it can reproduce. Top-ups are not a failure, they are simply how you keep the standing stock ahead of the grazing.
Where we fit
Pod-Shot is a ready-to-use pouch of live copepods for feeding today, with no preparation. It is the right product for topping up a mandarin's hunting ground or bridging a gap, and it is the wrong product for founding a refugium population, which is what the full culture pouches are for.
If you want the whole food web in one order, the Zooplankton Multipack combines live copepods, rotifers and phytoplankton. And if you are settling in for the long term, the Copepod Culture Kit lets you grow your own so you are never waiting on a delivery.
Your live food schedule: what to feed a new marine tank and when
The previous section covered why each stage matters. This one is the practical reference: the full live range, what each product is actually for, and the point in the process it belongs. Print it, stick it on the cabinet door, work down it.
Dried food has exactly two jobs in this story. During the cycle it can serve as an ammonia source if you are not using ammonium chloride, as covered in step two. Afterwards it is a daily staple for fish that will accept prepared food. Everything else in a young marine tank, meaning building the food web, feeding corals and filter feeders, and feeding fish that refuse prepared food, is live food. That is what this section covers.
One hard rule
Nothing live goes in until ammonia and nitrite both read zero 24 hours after a 2 ppm ammonia dose, and the final water change has been done. Live food is not an ammonia source and it will not survive a cycling tank. Nitrite touching zero on its own is not the signal. The 24-hour challenge is the signal. Every product below starts after that point.
The range at a glance
| Product | What it is | What it feeds | When to introduce |
|---|---|---|---|
| 5 Species Phytoplankton | Live blend of Nannochloropsis oculata, Tetraselmis, Isochrysis, Pavlova and Thalassiosira weissflogii, roughly 1 to 20 microns | Bacteria, copepod nauplii, sponges, clams, soft corals, refugium microfauna | First thing after the 24-hour test and the water change. This is the base layer, start here. |
| Reef Juice | Live four-species blend including Phaeodactylum tricornutum and Chlorella | Same broad base, with a different species mix competing for the same nutrients | Consider this as food-web support if a young tank starts showing early dinoflagellate pressure. |
| Phyto Shot | Ready-to-use Nannochloropsis pouch, 50 or 100 ml | As above, small volume | Trying phytoplankton for the first time without committing. |
| Live Reef Flourish | Concentrated five-species phytoplankton, dosed in drops | Same as the 5 Species blend | Small tanks and nanos where ml dosing is fiddly. |
| Live Copepods | Tigriopus californicus, 1 to 3 mm harpacticoid, cultured in Wales | Wrasse, mandarins, gobies, and the tank itself as a breeding population | Same window as the phytoplankton, before any fish go in. |
| PodHide and Copepod Bundle | Live copepods plus a reef-safe 3D-printed breeding shelter | As above, with protected structure to breed in | Essential on smooth dry rock, bare-bottom and rock-free systems. |
| Pod-Shot | Ready-to-use copepod pouch, 50 to 250 ml | Feeding fish today, no preparation | Top-ups once fish are grazing the population down. |
| Live Rotifers | Brachionus plicatilis, L-strain, 90 to 360 microns | LPS, filter feeders, fish larvae and fry | When corals go in, or the first time anything spawns. |
| Roti-Shot | Concentrated rotifer pouch, 50 or 100 ml | As above, on demand | Breeders and small regular additions. |
| Live Zooplankton | Copepods and rotifers combined, 90 to 400 microns | Broad spectrum, corals and fish in one addition | Once the tank is stocked and you want one product not two. |
| Zoo-Shot | Ready-to-use zooplankton pouch | Coral feeding without preparation | Target-feeding days. |
| Zooplankton Multipack | Copepods, rotifers and phytoplankton together | The complete food web in one order | The simplest way to do the whole post-cycle stage at once. |
Phytoplankton dosing rates for a new tank
How much, how often
5 Species Phytoplankton and Reef Juice both dose daily at 1 ml per 27 litres for light feeding, 1 ml per 18 litres for medium, and 1 ml per 9 litres for heavy reef feeding. In a tank that has just finished cycling, start at the light rate and build up over a few weeks as the food web develops. Live Reef Flourish is concentrated and doses at 1 to 4 drops per 80 litres daily instead.
Dose into a high-flow area with the skimmer off for an hour so it disperses rather than being stripped straight out. Keep pouches refrigerated and give them a gentle shake before use. If you want the exact figure for your volume, the dosing calculator on our site will work it out, and the feeding schedule builder will turn it into a weekly routine.
Reef Juice - Live Phytoplankton Blend

£9.99
Something has shifted in your tank. Brown film creeps across the sand bed in the mornings, corals look less extended than they should, and nothing in your water chemistry quite explains it. You have probably checked your nitrate and phosphate,… read more
Stage by stage through the first year
| Stage | Live food to add | Why then |
|---|---|---|
| Cycling, ammonia and nitrite present | Nothing | It will not survive and it adds to the organic load. |
| Nitrite first reaches zero | Still nothing. Run the final 2 ppm ammonia challenge. | Nitrite touching zero does not prove the tank can clear a full load. |
| 24-hour test passed and final water change done | 5 Species Phytoplankton, light rate, daily | Puts the base of the food chain in before anything needs to eat it. |
| Same window, no fish yet | Live Copepods, generously. PodHide bundle if the rockwork is smooth or absent. Phytoplankton continues daily. | Zero predation. This is the one window where a pod population can establish unopposed. |
| Weeks 2 to 4 after cycling | Phytoplankton daily, building towards the medium rate | Feeds the copepods you just added so the population climbs. |
| First corals go in | Add Live Rotifers or Roti-Shot alongside the phytoplankton | LPS and filter feeders target the 90 to 360 micron band. |
| First fish go in | Begin Pod-Shot top-ups. Phytoplankton and rotifers continue. | Grazing pressure starts the moment fish arrive. |
| Tank stocked, months 3 to 6 | Live Zooplankton or Zoo-Shot for broad-spectrum feeding | Covers corals and fish in one addition as the bioload grows. |
| Mandarins, pipefish, seahorses | Established pod population plus regular Live Copepods and Pod-Shot | Obligate live feeders. There is no dried substitute. |
Growing your own
If you are going to be feeding live food long term, and particularly if you are heading towards a mandarin or a breeding project, culturing your own works out considerably cheaper and means you are never waiting on a delivery.
Where we fit
The Copepod Culture Kit and Rotifer Culture Kit come with everything needed to run a culture at home, and the Phytoplankton Culture Kit lets you grow the feed for both. There are free step-by-step culture guides on the site for all three.
Step four: get through the ugly stage
Somewhere between weeks three and twelve, your clean new tank will turn brown, then possibly green, and you will wonder what you have done wrong. You have not done anything wrong. This is the tank finding its balance, and every tank goes through it.
The usual sequence is diatoms first, a brown dusting over sand and glass, feeding on silicate left over from the rock and the salt mix. Then often cyanobacteria, appearing as red or purple slime sheets. Then hair algae or bryopsis, feeding on the nitrate and phosphate the cycle left behind. Each phase generally passes on its own as the nutrient source is exhausted and the rock is colonised by coralline algae and biofilm that outcompete it.
What to do
Keep up water changes, because that is the main lever you have. Siphon algae out physically rather than just scrubbing it, so the nutrients leave the system. Add a modest clean-up crew once diatoms appear and there is genuinely something for them to eat, snails first and hermits sparingly, and do not overstock, because an oversized clean-up crew starves once the algae clears. Run a refugium with macroalgae if you have a sump, since it exports nitrate and phosphate and doubles as pod habitat. And keep testing, aiming for nitrate under 10 ppm and phosphate around 0.03 to 0.10 ppm in a young mixed reef.
What not to do
Do not tear the tank down and start again, because you are almost always weeks from it resolving. Do not chase zero nutrients either, since a tank with zero nitrate and zero phosphate is a starving tank, and starving tanks get cyanobacteria and dinoflagellates, which are far harder to shift than hair algae. Do not add chemical algaecides, which treat the symptom and disrupt the biology you just spent two months building. And do not stop feeding phytoplankton because you are worried about nutrients. Live phytoplankton is consumed by the food web, not left to rot, and a starved young tank is more vulnerable to dinoflagellates than a fed one.
Step five: stock slowly
Your biological filter sized itself to the ammonia load you gave it during the cycle. Add livestock faster than the bacteria can multiply and you will get a small ammonia spike in an established tank, which is how newly cycled tanks lose fish.
| When | Add | Why |
|---|---|---|
| Cycle complete | Phytoplankton and copepods. Rotifers only if corals or filter feeders are being added. | No predators. Best possible window to establish the food web. |
| Plus 1 to 2 weeks | Small clean-up crew | Only once diatoms give them something to eat. |
| Plus 3 to 4 weeks | First one or two hardy fish | Clownfish or a small goby. Then wait and test. |
| Plus 6 to 8 weeks | Soft corals and hardy LPS | Nutrients should be stabilising by now. |
| Month 4 onwards | Further fish, one at a time | Two to three weeks between additions, quarantined. |
| Month 6 to 12 | SPS, mandarins, sensitive species | Mandarins need a mature, well-stocked pod population, not just a cycled tank. |
Quarantine every fish. It is the single most effective thing you can do to avoid losing a whole display to velvet or ich, and it is a good use for a rock-free tank running on a seeded sponge filter.
Mistakes I see most often when people learn how to cycle a marine aquarium
| Mistake | What to do instead |
|---|---|
| Stocking on a low ammonia reading alone | Only the 24-hour test proves a cycle. Ammonia and nitrite both at zero after 24 hours, or you wait. |
| Dosing ammonia far above 2 ppm | Excess nitrite inhibits the bacteria and stalls the cycle for weeks. Stay at 2 ppm. |
| Water changes during the cycle | Unnecessary unless nitrite is off the chart or alkalinity has crashed. Save the big change for the end. |
| Cycling with tap water | Phosphate and silicate will feed algae for months. Use RO or RO/DI. |
| Adding a mandarin to a two-month-old tank | Mandarins need an established copepod population, which takes months to build. Start the pods early, add the fish late. |
| Treating a rock-free tank like a rock tank | Far less biological reserve. Provide biomedia deliberately, stock slower, test more. |
| Giving up during the ugly stage | It passes. Water changes, siphoning, patience. |
| Never adding microfauna at all | A dry rock tank stays sterile unless you seed it. The best time is before the fish go in. |
How to cycle a marine aquarium: the short version
- RO or RO/DI water, 35 ppt, 25 to 26 °C, good flow.
- Choose your rock route and provide surface area accordingly. No rock means biomedia, deliberately.
- Dose ammonia to 2 ppm, using ammonium chloride or a pinch of dried food. Never live food. Seed with bacteria or established media.
- Test every day or two. Ammonia spikes and falls. Nitrite spikes and falls. Ignore nitrate readings until nitrite is zero, because nitrite skews many nitrate kits.
- Redose ammonia to 2 ppm whenever it hits zero, so the bacteria keep feeding.
- Pass the 24-hour test: both ammonia and nitrite at zero, 24 hours after a 2 ppm dose.
- Large water change to reset nitrate and phosphate.
- Only now start phytoplankton, then copepods, while there are no predators to eat them.
- Ride out the ugly stage with water changes, siphoning and patience.
- Stock slowly. Quarantine everything. Sensitive species last.
That is everything I would tell you about how to cycle a marine aquarium if you rang me up and asked. If you get partway through and something does not look right, please just get in touch. I would far rather answer a question at week four than hear about a problem at week twelve.
Darren
Director, Reefphyto Ltd, Wales. Est. 2008, 18+ years of hands-on marine aquaculture experience.
More free guides and tools: the phytoplankton dosing calculator, the feeding schedule builder, and the full guides, tools and resources hub.