
The Ultimate Guide to Beating Euphyllia - Eating Flatworms
Introduction
As a coral shop, we encounter a variety of pests, but few are as alarming as the euphyllia-eating flatworm—also known as the polyclad worm. These relentless predators can wreak havoc on your prized Euphyllia corals, making them a nightmare for casual reefers and seasoned hobbyists alike. Over the years, I’ve become an expert at identifying, managing, and fully eradicating these pests.
No matter how far along you are in the battle against them, this guide will equip you with the knowledge and techniques to protect your reef and keep your corals thriving.
How Flatworms Enter Your Reef
Euphyllia-eating flatworms can infiltrate your reef in two forms—either as fully developed worms or as nearly invisible eggs attached to the coral. This makes them particularly challenging to detect, and if left unnoticed, they can spread rapidly.
The problem often begins at the source: if a seller fails to identify and properly treat an infested coral before selling it, the burden falls on you, the buyer, as the last line of defence. Without careful inspection and preventative measures, introducing just one infected coral into your thriving reef can lead to a full-blown infestation.
My First Encounter With Flatworms
The Good News? We Can Beat It.
Back in my early reefing days, I managed to overcome a euphyllia-eating flatworm infestation—without even having access to coral dip—and the coral is still thriving today!
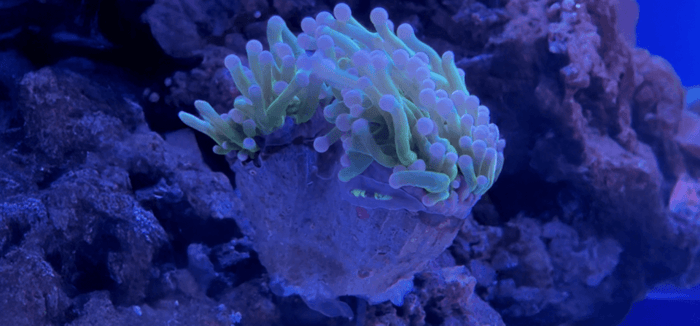
At the time, I had no idea these pests existed. My new torch coral looked perfectly fine at purchase, but a few days later, I noticed something unusual. Around the rim of the coral, I spotted several worm-like creatures that closely matched the fleshband’s colour—about seven in total. One even had a torch polyp tip stuck to it, a clear sign that these weren’t harmless hitchhikers.
A quick dive into research confirmed my worst fear: my prized new torch coral was at serious risk, and if I didn’t act fast, its fate was sealed. I had no coral dip, but I wasn’t going to give up without a fight. Armed with a fish tank toothbrush and RO water, I carefully submerged the coral. As the flatworms wriggled off, I gently picked them away, determined to save my coral.
To minimise further risk, I isolated the torch coral before leaving for a short trip, hoping it would hold on while I was away. To my relief, when I returned, the coral was still alive, though a few worms remained. I repeated the manual removal process and took a closer look—this time, I spotted multiple clutches of eggs just beneath the torch’s skinband. I scrubbed them off meticulously, determined to eliminate every last trace of the infestation.
For the next few weeks, I anxiously inspected my torch every few days. Slowly but surely, I emerged victorious—flatworm-free! The worms had eaten away some of the flesh, but with time and low-flow conditions, my coral recovered beautifully.
Now that you know my battle-tested experience, let me walk you through the best method for the majority of reefers—this time, using coral dip for maximum effectiveness.
Examine, Dip, Repeat!
The best and easiest method to defeating euphyllia-eating flatworms is simple yet highly effective. The key? Diligence and consistency.
Step 1: Examine – Your First Line of Defence
This step is absolutely crucial. Your eyes are the best tool for preventing these pests from taking over your reef.
- Any time you purchase a new coral, make it a rule to conduct a thorough visual inspection before adding it to your tank.
- Check the coral both when it’s fully extended and when it’s retracted—polyps can sometimes obscure hidden worms or eggs.
- Examine any existing Euphyllia in your tank as well. If you’ve unknowingly introduced flatworm eggs before, you may already have hatched worms lurking among your corals.
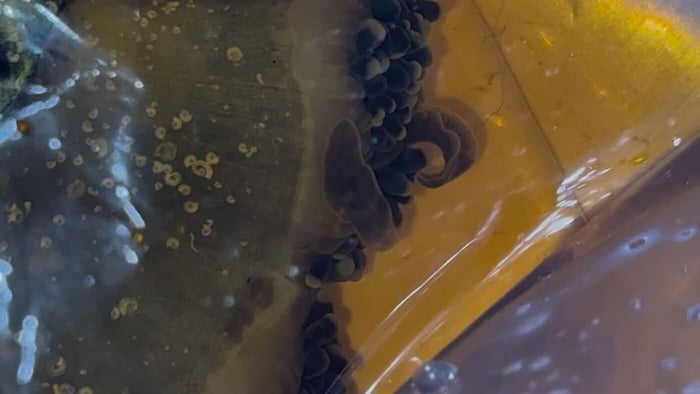
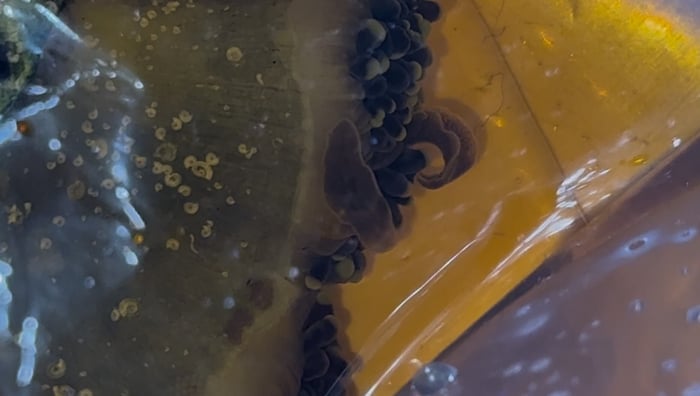
The eggs, in my experience, are always clustered in distinct groups and are relatively easy to spot if you know where to look.
Step 2: Dip – But Know Its Limits
While dipping your new coral is standard practice, it’s important to understand that most dips will not kill flatworm eggs. This is why one dip is never enough to completely eliminate the problem.
When performing your dip, focus on inspecting for eggs rather than just the worms—the adults may detach, but if eggs remain, the problem will persist.
- When you spot eggs—or even just one flatworm—there’s a high chance more eggs are hidden somewhere.
- To fully eradicate them, perform weekly dips on the affected coral. This will eliminate newly hatched worms before they reach adulthood and reproduce.
- Continue this routine until you no longer see eggs or adult flatworms.
However, be cautious: flatworms can move from coral to coral, making containment critical. This brings us to the next essential step.
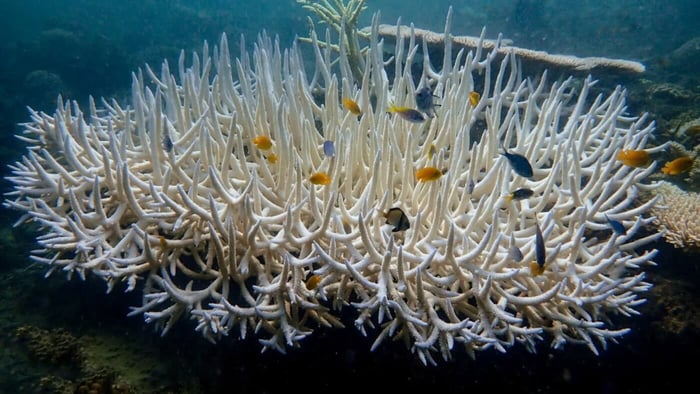
How Bad Can They Be? Recognising the Signs of Flatworm Damage
Euphyllia-eating flatworms are fast-producing, well-hidden, and have only one goal—destruction.
If left unchecked, these pests will slowly consume your coral from the edges inward, often going unnoticed until significant damage has occurred. In the early stages, you may see subtle signs such as localized tissue recession or irritation in a specific area. Over time, this can escalate into more severe symptoms, such as:
- Receding fleshbands, especially along the base of the coral
- Exposed skeleton, where healthy tissue has been eaten away
- Polyp retraction or poor extension, as the coral experiences increasing stress
- Discolouration or patchy tissue, indicating declining health
Torch Corals: Signs & Recovery
Torch corals, in particular, can recover well if the infestation is caught early and the worms are completely eradicated. However, as with any coral experiencing stress, proper aftercare is essential to prevent further complications.
- Low flow is crucial to avoid tissue damage leading to polyp bailout. Strong currents can worsen exposed areas, making recovery harder.
- A dip containing iodine, like Seachem Reef Dip, is highly recommended. Iodine helps prevent secondary bacterial infections that can develop in damaged tissue.
- Seachem’s dip also allows for a more concentrated treatment, making it more effective in flushing out hidden worms that other dips might miss.
Final Thoughts: Stay Vigilant & Take Action
Now, you have all the knowledge you need to defeat this relentless pest and get your Euphyllia thriving again.
By following these steps—examine, dip, repeat—you’ll drastically reduce the chances of a full-blown infestation and keep your Euphyllia corals healthy, vibrant, and pest-free.
Blog Post Writen by Jordan Robins @ https://www.coralvault.co.uk/